
 This project was conceived of after the 2013 Standish Standoff but was not completed until Dec of 2014. I wanted to really spend some time and sub assemble and paint this in parts so I could paint the inside as well as the outside of the vehicle. I also wanted to do some LED light effects and this required painting and sealing the model before putting in the lights. I think just the build time to figure out wiring placement as well as how to house the battery switch and circuit board took me months real time. In the end I was able to fit everything in the hollow of the engine block in the rear of the model as well as the voids between the inner and outer hull along the sides. Dremeling out holes for the switch and battery into the frame of the model took some time and ended with me getting hot melted plastic frag in the face.
 I dry fit everything a lot to make sure all the parts fit before I even started to prime pieces. The hardest part was hand drilling out the back of the headlights to set the LEDS in while still leaving the molded plastic grill from the lights. I also had to cut into the frame for the side doors to create a hinge for the doors so they could open and close. I ended up using a dremel blade and cutting into them downwards to make a groove, then green stuffed back in to create the top of the hinge. The paper clip was simple drilled through the hing parts at the base of the door.
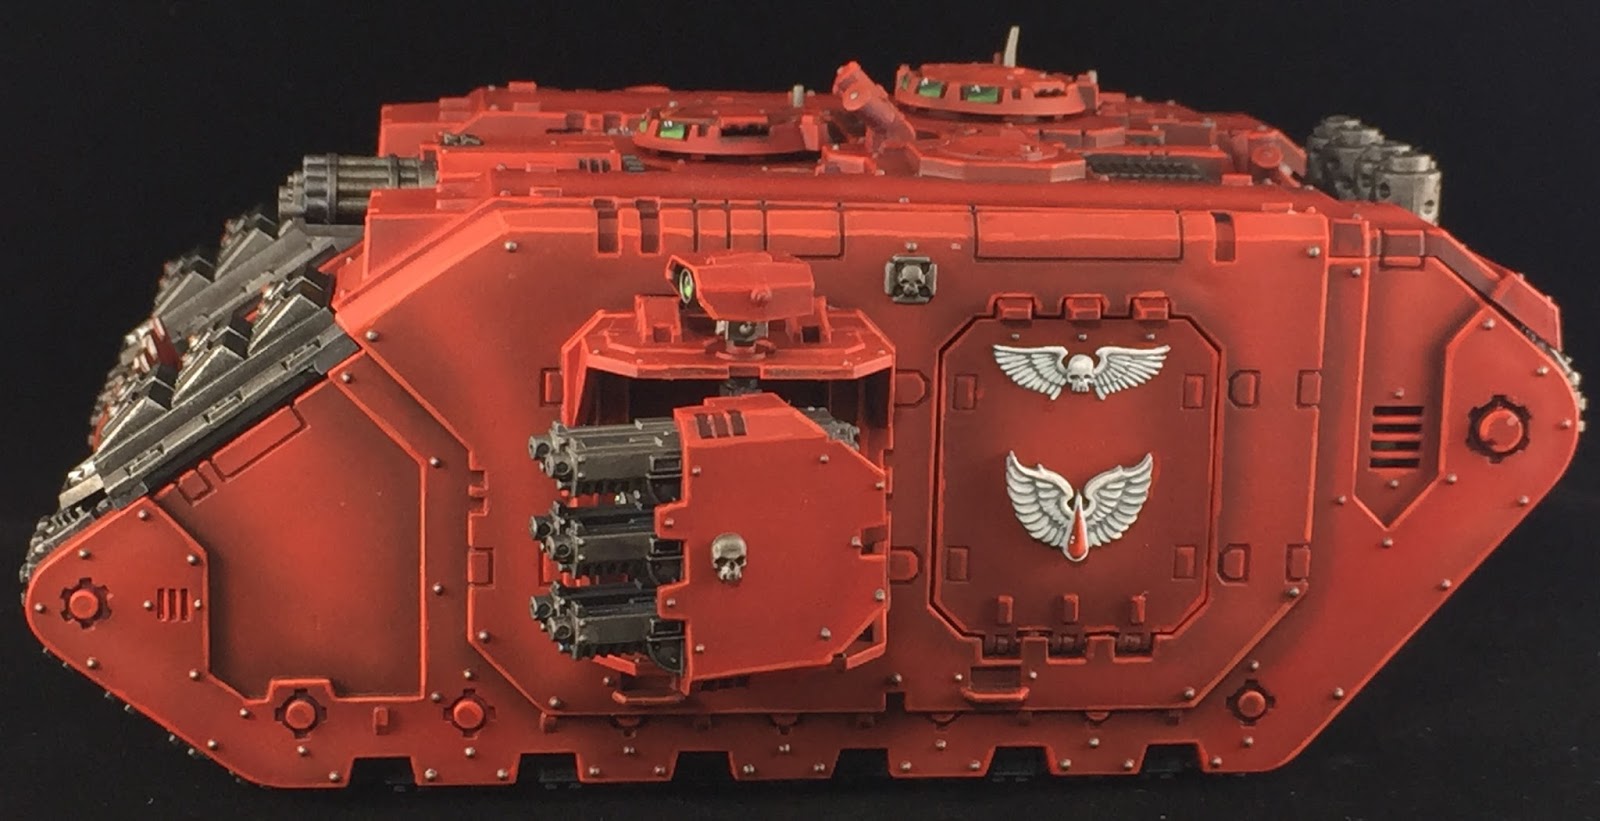
 This is the first time I really got a solid use of my Airbrush to paint this model, rather than just putting down a base coat. I used a technique I had started to use with some Rhino's I was practicing on as well as some terrain. I pre-shaded the model before laying down the red. Essentially I primed the model Grey. Then played down black first into the recesses and other areas I wanted to be darker. Then I went back and added white into the center of the flat areas that I wanted to brighten. After doing this I then laid in some light thin red coats being careful to allow the transparency of the red to show thru and not cover up the black entirely. It gave the model some great highlights and vibrancy. Having the model broken up into larger but separate pics really helped in doing this painting style. I had the top, sides, back and bottom as distinct separate sections. Along with the gun mounts and hatches as separate parts. This prevented over-spray from being an issue to cloud sections I had already painted.
 Once I finished the base coat to the armor plating I did some edge highlighting all along the model and picked out details and painted in the treads and other elements of the model with a more traditional brush and wash method. This model really represents a HUGE step up in the quality of my painting. To see just how much go back and look at part 4 of the series with my Grey Knight Rhinos. This model also represented a huge change in time commitment. Although I only spent two weeks real time painting it, that represented 20+ hours of actual painting time. I ended up out of state on a business training trip and had plenty of alone time without my wife or other distractions to help me focus and do nothing else but paint this model.
I've tried to provide enough pictures to show every aspect of this model, and those elements that move, and change. Most the shots are with the LED lights off to photograph better. I plan to possibly enter this model in the Painting competition for the Standish Standoff this year. The only reason this is a maybe is as you will see next post I may have topped myself.


2 comments:
WOW!
Your Blood Angel work is awesome!
Yeah my vehicles have really come a long way.
Post a Comment